Exercise
In this hands-on exercise, we will deploy Longhorn, a block storage solution from Rancher. Longhorn is also a CNCF project.

Environment
For this exercise, we need a 3-nodes cluster.
Deploying Longhorn
Use the following command to deploy Longhorn on your cluster.
kubectl apply -f https://raw.githubusercontent.com/longhorn/longhorn/v1.5.2/deploy/longhorn.yamlVarious components will be created:
namespace/longhorn-system created
serviceaccount/longhorn-service-account created
serviceaccount/longhorn-support-bundle created
configmap/longhorn-default-setting created
configmap/longhorn-storageclass created
customresourcedefinition.apiextensions.k8s.io/backingimagedatasources.longhorn.io created
customresourcedefinition.apiextensions.k8s.io/backingimagemanagers.longhorn.io created
customresourcedefinition.apiextensions.k8s.io/backingimages.longhorn.io created
customresourcedefinition.apiextensions.k8s.io/backups.longhorn.io created
customresourcedefinition.apiextensions.k8s.io/backuptargets.longhorn.io created
customresourcedefinition.apiextensions.k8s.io/backupvolumes.longhorn.io created
customresourcedefinition.apiextensions.k8s.io/engineimages.longhorn.io created
customresourcedefinition.apiextensions.k8s.io/engines.longhorn.io created
customresourcedefinition.apiextensions.k8s.io/instancemanagers.longhorn.io created
customresourcedefinition.apiextensions.k8s.io/nodes.longhorn.io created
customresourcedefinition.apiextensions.k8s.io/orphans.longhorn.io created
customresourcedefinition.apiextensions.k8s.io/recurringjobs.longhorn.io created
customresourcedefinition.apiextensions.k8s.io/replicas.longhorn.io created
customresourcedefinition.apiextensions.k8s.io/settings.longhorn.io created
customresourcedefinition.apiextensions.k8s.io/sharemanagers.longhorn.io created
customresourcedefinition.apiextensions.k8s.io/snapshots.longhorn.io created
customresourcedefinition.apiextensions.k8s.io/supportbundles.longhorn.io created
customresourcedefinition.apiextensions.k8s.io/systembackups.longhorn.io created
customresourcedefinition.apiextensions.k8s.io/systemrestores.longhorn.io created
customresourcedefinition.apiextensions.k8s.io/volumes.longhorn.io created
customresourcedefinition.apiextensions.k8s.io/volumeattachments.longhorn.io created
clusterrole.rbac.authorization.k8s.io/longhorn-role created
clusterrolebinding.rbac.authorization.k8s.io/longhorn-bind created
clusterrolebinding.rbac.authorization.k8s.io/longhorn-support-bundle created
service/longhorn-backend created
service/longhorn-frontend created
service/longhorn-conversion-webhook created
service/longhorn-admission-webhook created
service/longhorn-recovery-backend created
service/longhorn-engine-manager created
service/longhorn-replica-manager created
daemonset.apps/longhorn-manager created
deployment.apps/longhorn-driver-deployer created
deployment.apps/longhorn-ui created
After a few seconds, you can verify that the Pods deployed by Longhorn are running in the longhorn-system namespace:
$ kubectl -n longhorn-system get po
NAME                                          READY   STATUS    RESTARTS       AGE
csi-attacher-dcb85d774-6rclb                  1/1     Running   0              3m52s
csi-attacher-dcb85d774-b52fq                  1/1     Running   0              3m52s
csi-attacher-dcb85d774-khbtd                  1/1     Running   0              3m52s
csi-provisioner-5d8dd96b57-2bdhk              1/1     Running   0              3m52s
csi-provisioner-5d8dd96b57-2gpgr              1/1     Running   0              3m52s
csi-provisioner-5d8dd96b57-7666k              1/1     Running   0              3m52s
csi-resizer-7c5bb5fd65-29lkj                  1/1     Running   0              3m51s
csi-resizer-7c5bb5fd65-kxfm6                  1/1     Running   0              3m51s
csi-resizer-7c5bb5fd65-tfwwm                  1/1     Running   0              3m51s
csi-snapshotter-5586bc7c79-h4jrn              1/1     Running   0              3m51s
csi-snapshotter-5586bc7c79-m45l8              1/1     Running   0              3m51s
csi-snapshotter-5586bc7c79-pp962              1/1     Running   0              3m51s
engine-image-ei-df38d2e5-dmm84                1/1     Running   0              4m1s
engine-image-ei-df38d2e5-f68dr                1/1     Running   0              4m1s
engine-image-ei-df38d2e5-wqzbf                1/1     Running   0              4m1s
instance-manager-e-267474d1                   1/1     Running   0              4m1s
instance-manager-e-91c24732                   1/1     Running   0              4m
instance-manager-e-d0749d62                   1/1     Running   0              3m59s
instance-manager-r-146fa6a5                   1/1     Running   0              3m59s
instance-manager-r-a5634c0a                   1/1     Running   0              4m
instance-manager-r-e727863e                   1/1     Running   0              4m1s
longhorn-admission-webhook-d956bb867-hqxwc    1/1     Running   0              4m47s
longhorn-admission-webhook-d956bb867-mbcc2    1/1     Running   0              4m47s
longhorn-conversion-webhook-9d6975c9c-52nfp   1/1     Running   0              4m49s
longhorn-conversion-webhook-9d6975c9c-pwztk   1/1     Running   0              4m48s
longhorn-csi-plugin-2428t                     2/2     Running   0              3m50s
longhorn-csi-plugin-q9zdc                     2/2     Running   0              3m50s
longhorn-csi-plugin-thr6z                     2/2     Running   0              3m50s
longhorn-driver-deployer-658c44c955-hdnb5     1/1     Running   0              4m49s
longhorn-manager-5z8ps                        1/1     Running   0              4m49s
longhorn-manager-9gx89                        1/1     Running   1 (4m2s ago)   4m49s
longhorn-manager-f8qs4                        1/1     Running   1 (4m2s ago)   4m49s
longhorn-ui-8685dc7d7b-4dntj                  1/1     Running   0              4m49s
A StorageClass has also been created:
$ kubectl get sc
NAME       PROVISIONER          RECLAIMPOLICY   VOLUMEBINDINGMODE   ALLOWVOLUMEEXPANSION   AGE
longhorn   driver.longhorn.io   Delete          Immediate           true                   4m56s
Note: If your cluster doesn’t already have a default StorageClass, you can use the following command to set Longhorn’s StorageClass as default:
kubectl patch storageclass longhorn -p '{"metadata": {"annotations":{"storageclass.kubernetes.io/is-default-class":"true"}}}'Accessing the Web Interface
Use the following command to expose Longhorn’s web interface via port-forward:
kubectl port-forward -n longhorn-system service/longhorn-frontend 8080:80
Note: If you are accessing the cluster from an intermediate server (which has no interface other than the terminal), you can either:
Use the –address 0.0.0.0 option in the port-forward command to access port 8080 from all network interfaces of the machine (and thus also from its external IP).
Change the type of the longhorn-frontend service from ClusterIP to NodePort. After running the following command, you will be able to access the Longhorn interface via port 30000 from any of your cluster’s nodes:
kubectl -n longhorn-system patch svc/longhorn-frontend -p '{"spec": {"type": "NodePort", "ports": [{"port": 80, "nodePort": 30000}]}}'Creating a volume
The following specification defines a PersistentVolumeClaim based on the StorageClass created before:
cat << EOF | kubectl apply -f -
apiVersion: v1
kind: PersistentVolumeClaim
metadata:
  name: mongo-pvc
spec:
  storageClassName: longhorn
  accessModes:
  - ReadWriteOnce
  resources:
    requests:
      storage: 5G
EOF
You can then see that both a PVC and a PV have been created:
$ kubectl get pvc,pv
NAME STATUS VOLUME CAPACITY ACCESS MODES STORAGECLASS AGE
persistentvolumeclaim/mongo-pvc Bound pvc-b5b... 5Gi RWO longhorn 61s
NAME CAPACITY ACCESS MODES RECLAIM POLICY STATUS CLAIM STORAGECLASS REASON AGE
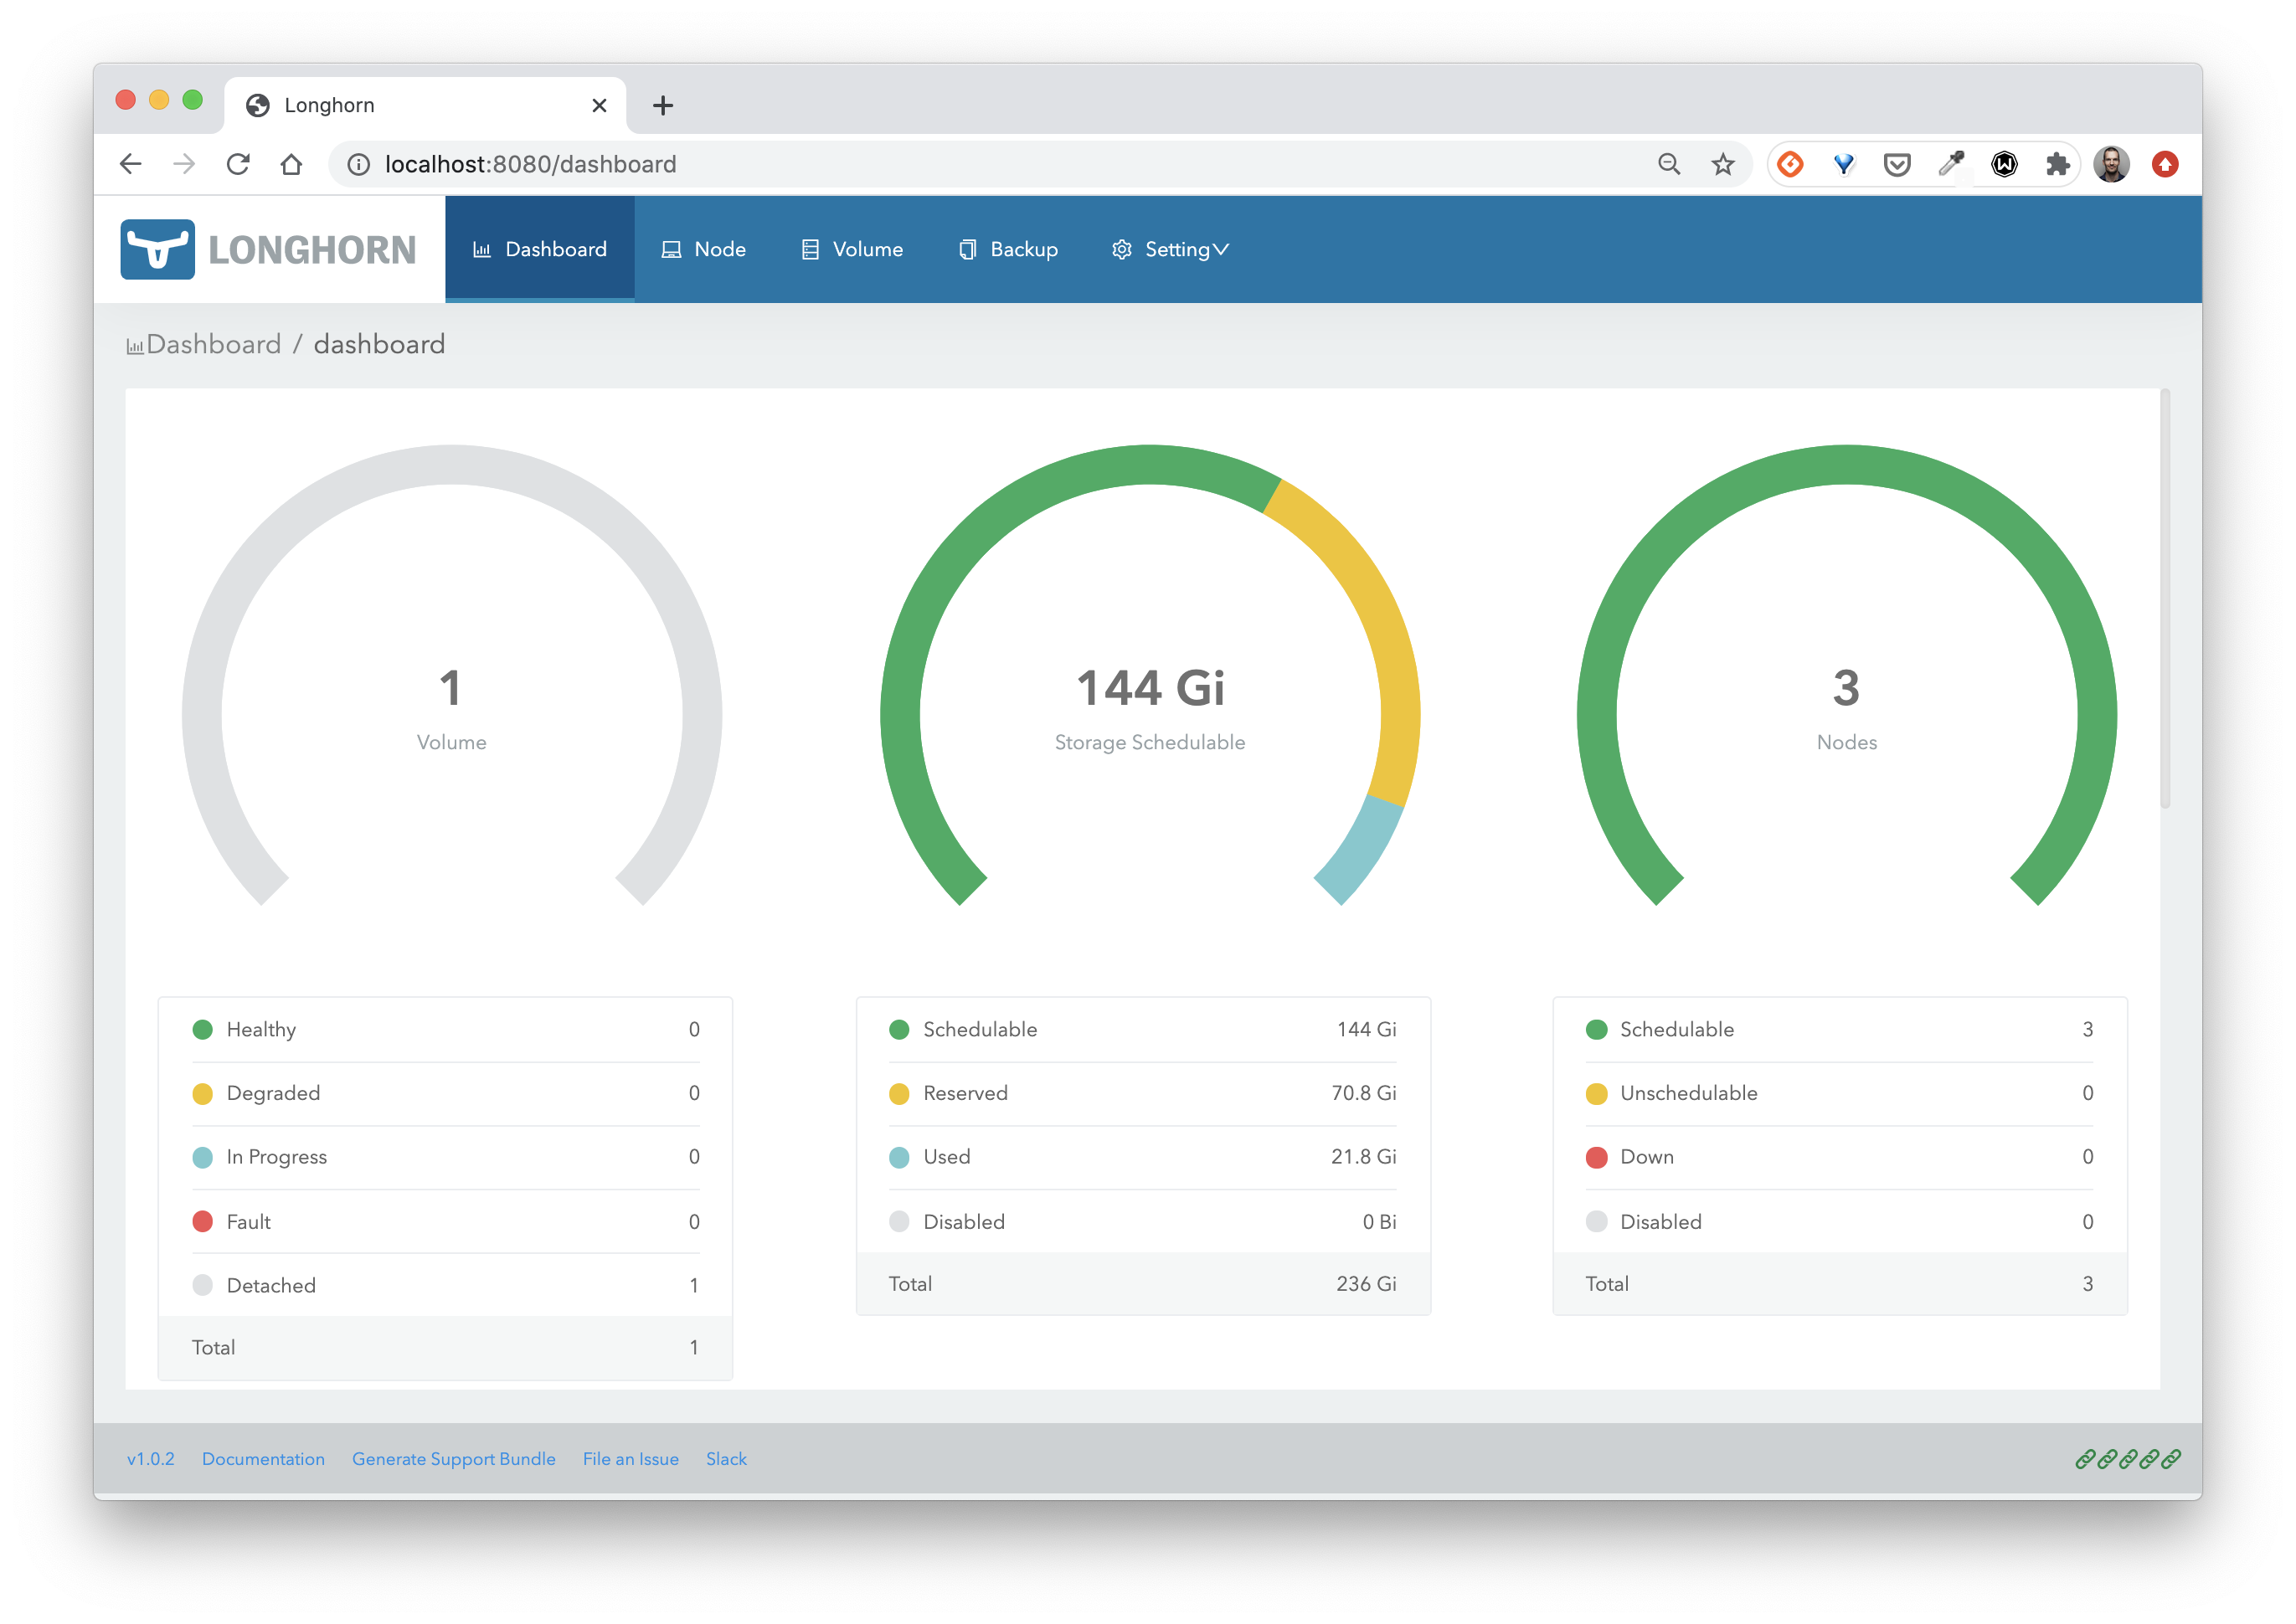
pv/pvc-b5b... 5Gi RWO Delete Bound default/mongo-pvc longhorn 57sFrom Longhorn dashboard you can see a volume has been created:
In the following section, you will use this volume within a Deployment.
Using a PVC for a database workload
Create the following Deployment, which uses the mongo-pvc PVC created earlier.
cat << EOF | kubectl apply -f -
apiVersion: apps/v1
kind: Deployment
metadata:
name: db
spec:
selector:
matchLabels:
app: db
template:
metadata:
labels:
app: db
spec:
containers:
- image: mongo:4.0
name: mongo
ports:
- containerPort: 27017
volumeMounts:
- name: mongo-persistent-storage
mountPath: /data/db
volumes:
- name: mongo-persistent-storage
persistentVolumeClaim:
claimName: mongo-pvc
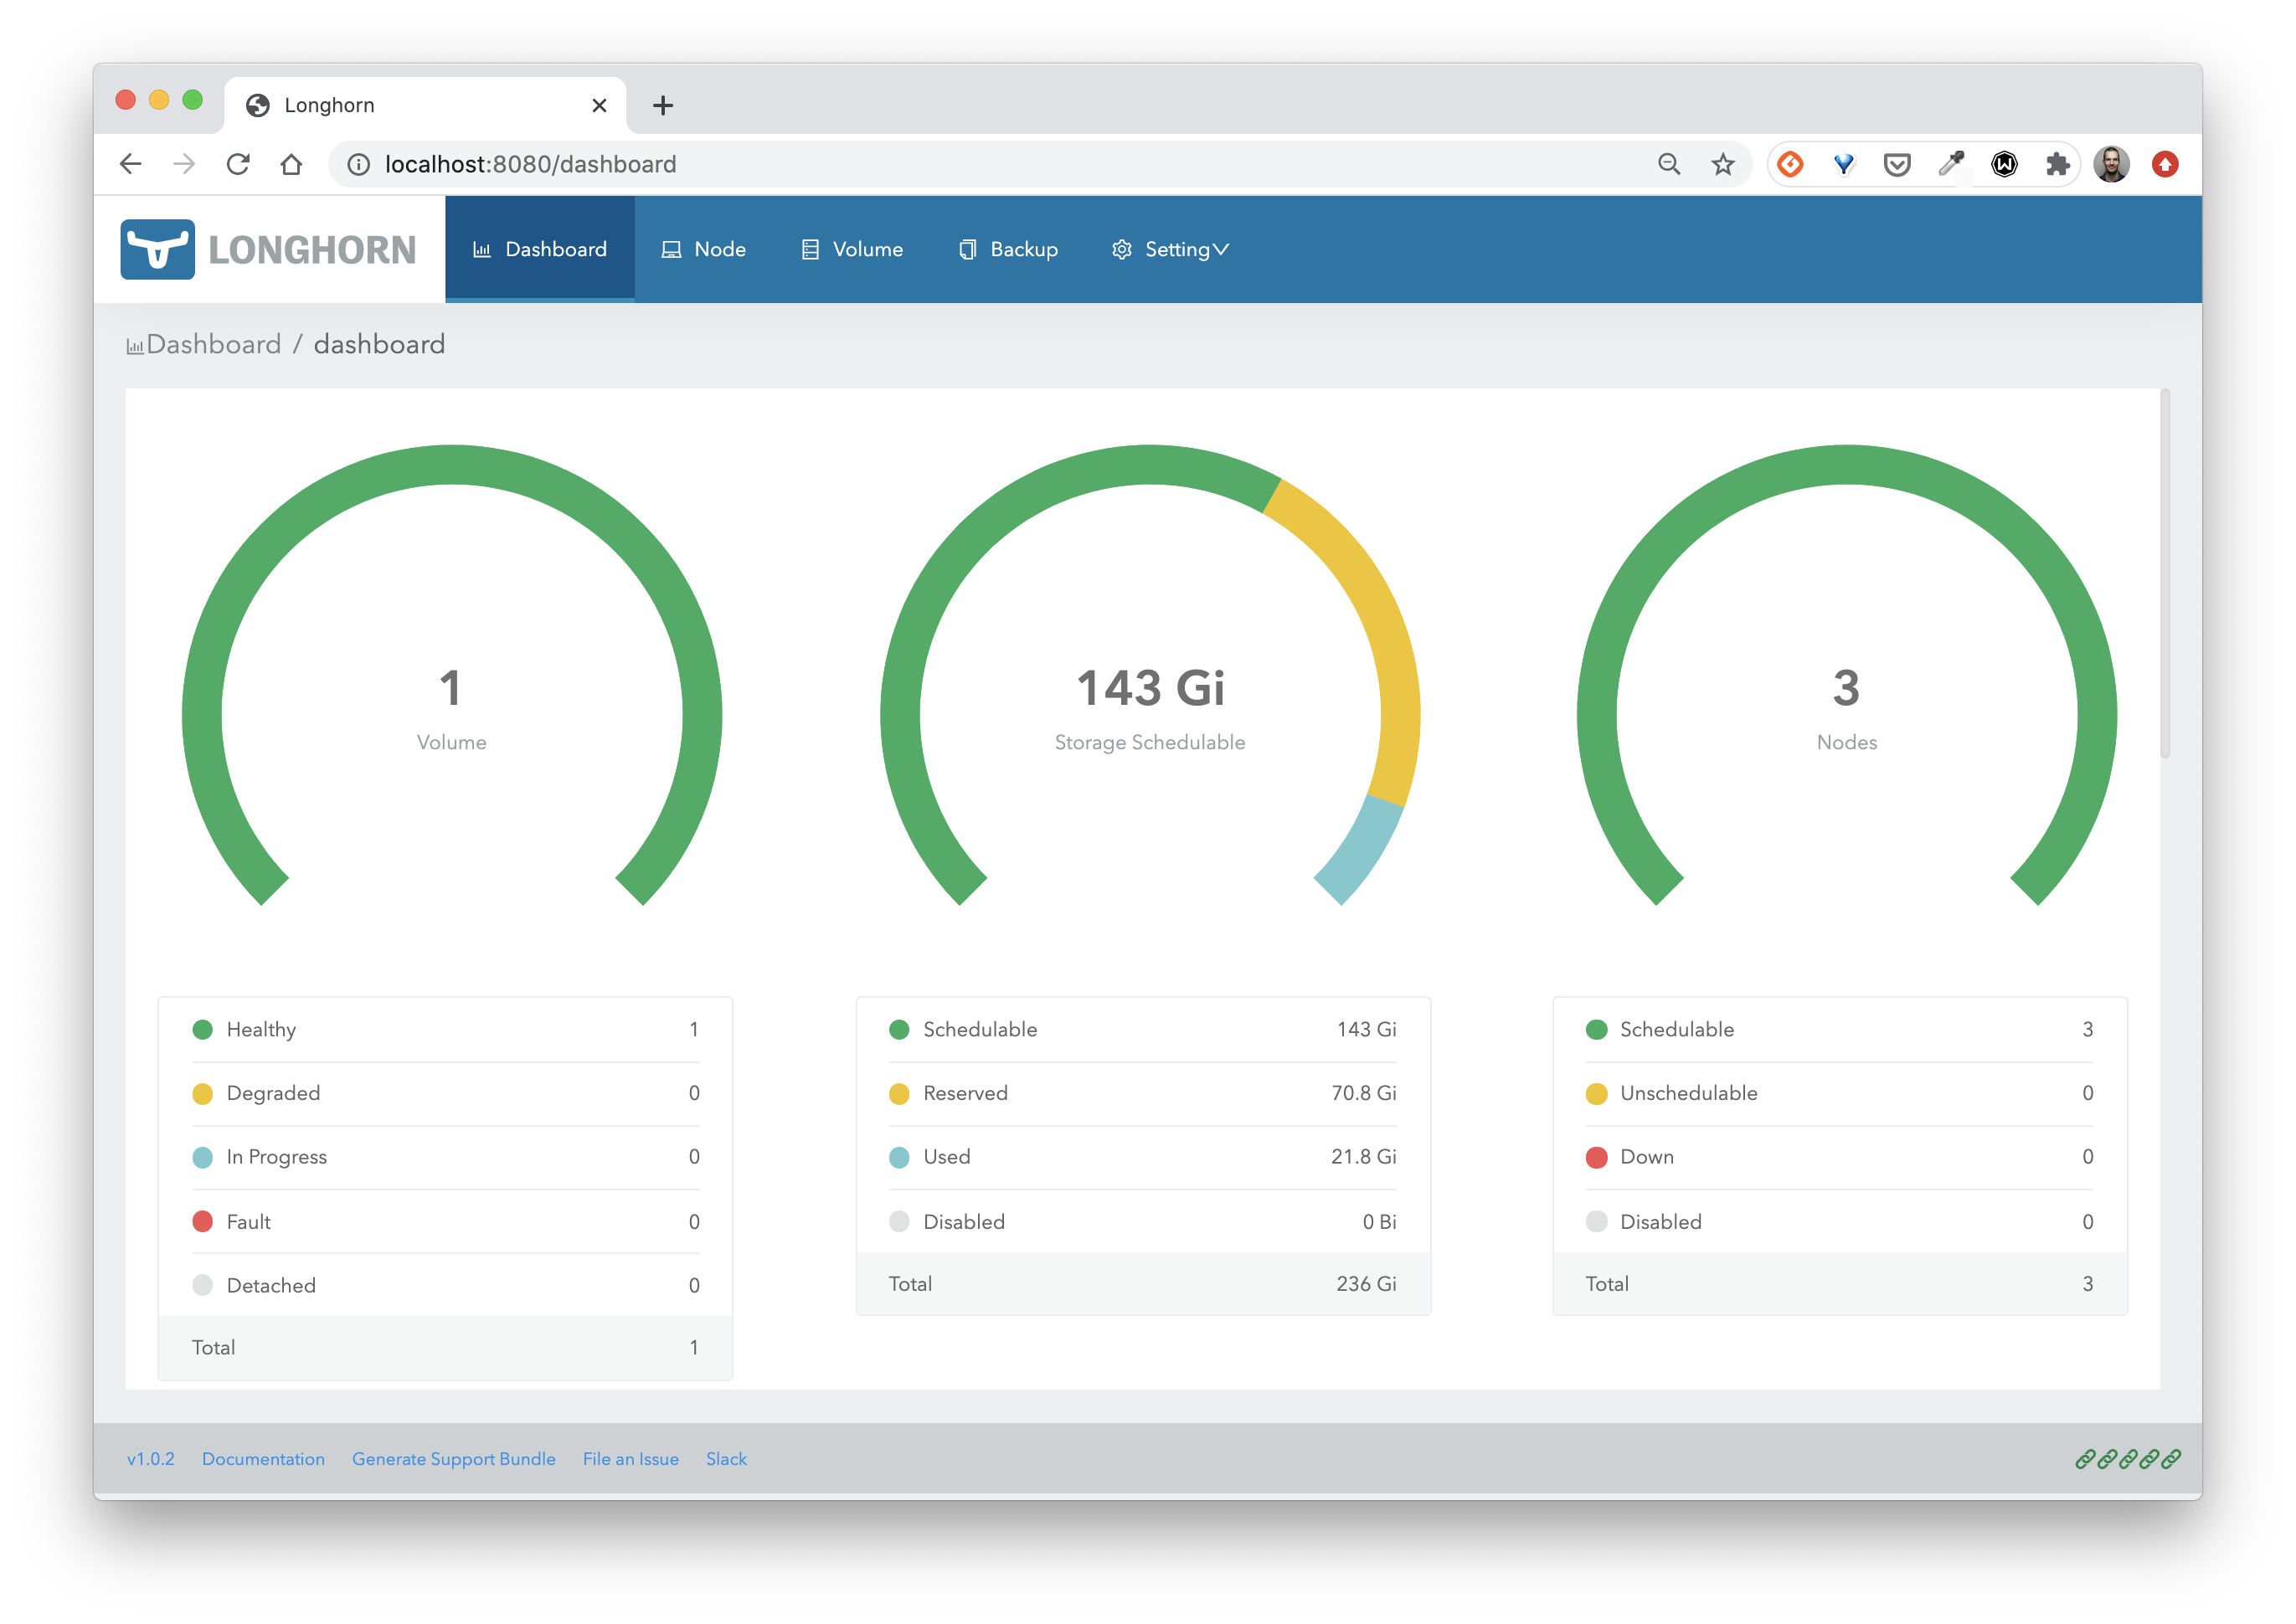
EOFFrom the Longhorn dashboard, you can see the volume is now available:
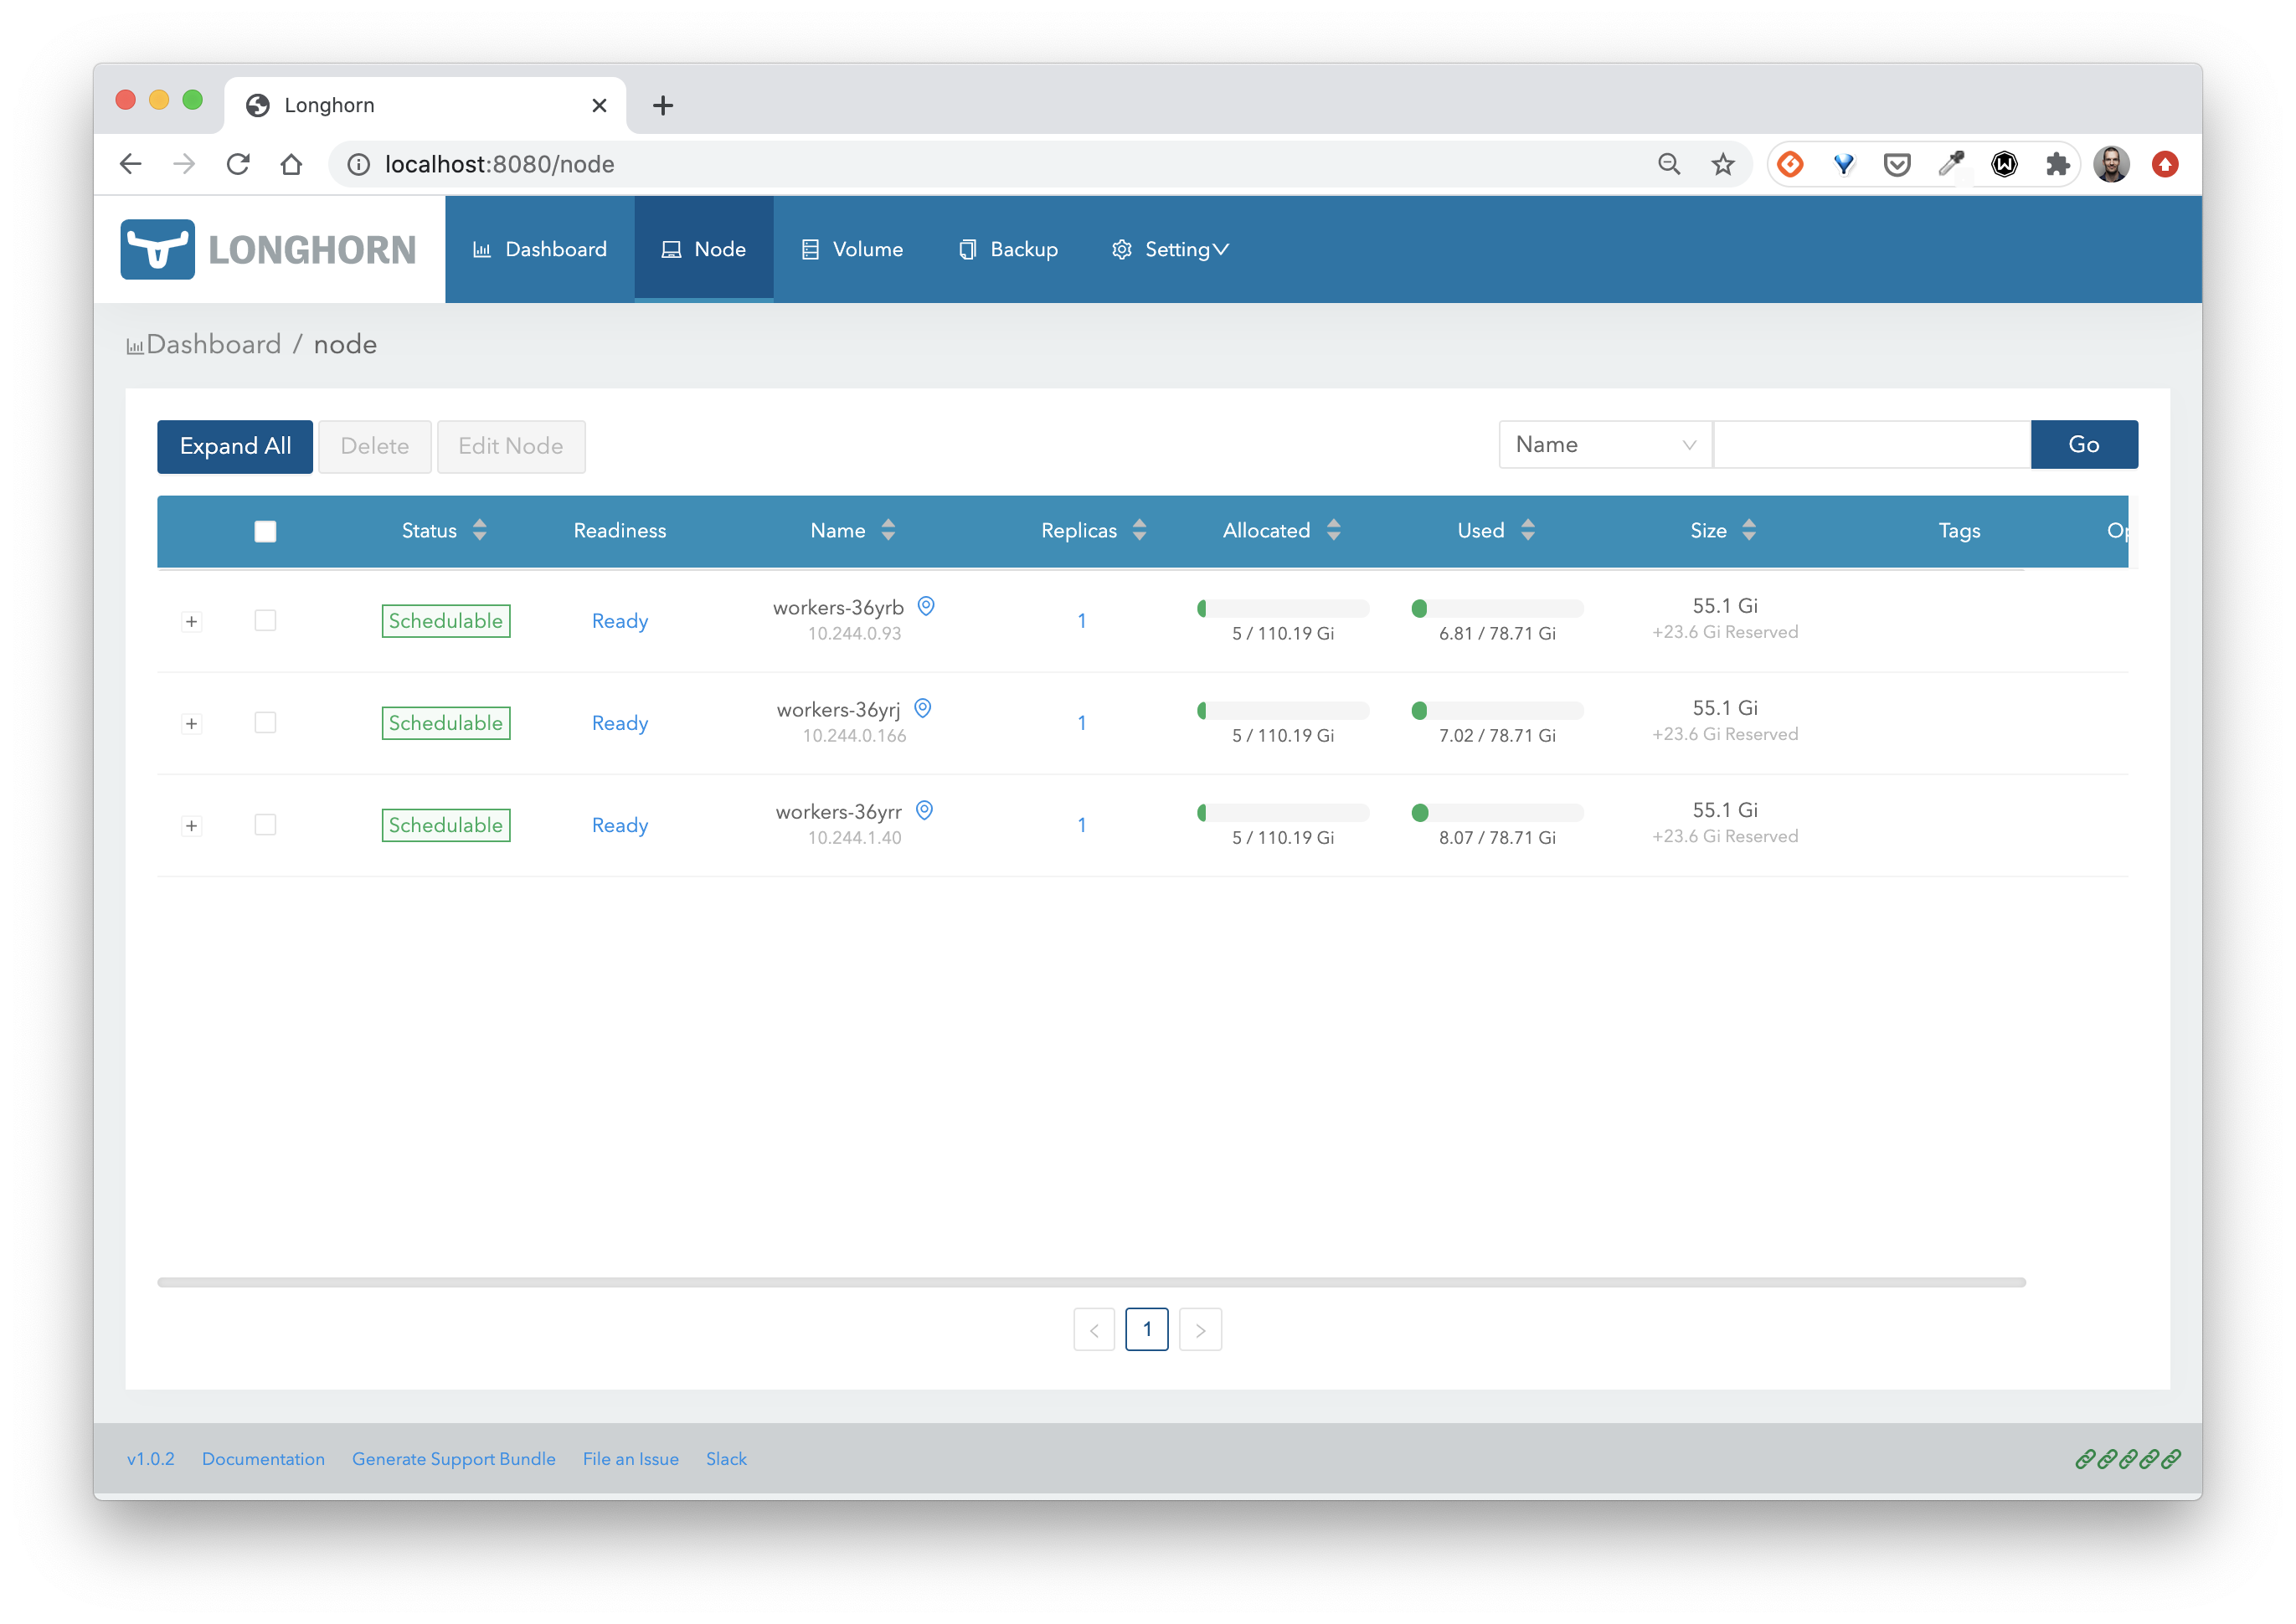
From the Node menu, you can see that the volume has been replicated across the nodes in the cluster.
Cleanup
Delete the resources created earlier:
kubectl delete deploy db
kubectl delete pvc mongo-pvc
Uninstalling Longhorn is a 2 steps process:
- first run the uninstallation job and wait for it to complete:
kubectl create -f https://raw.githubusercontent.com/longhorn/longhorn/v1.5.2/uninstall/uninstall.yaml
kubectl get job/longhorn-uninstall -n longhorn-system -w- next run the following commands:
kubectl delete -f https://raw.githubusercontent.com/longhorn/longhorn/v1.5.2/deploy/longhorn.yaml
kubectl delete -f https://raw.githubusercontent.com/longhorn/longhorn/v1.5.2/uninstall/uninstall.yaml